
Back at it with the HG Graze Kai, painting armor pieces and applying decals. I'm working quite slowly on this kit, perhaps due to my old-man-back, that which prevents me from sitting in my chair for the hours on end necessary to complete a full kit. This is a young man's game! Read on for more geriatric musings.

For the armor panels on this Graze I figured I would continue with my Kshatriya-esque color scheme and try to mix a nice custom green. The best combo I found was the #15 Dark Green mixed with just about equal parts Sky Blue and Yellow Orange; at first, the added blue created an almost iridescent aquamarine, super styley, but not what I was going for. The addition of yellow orange definitely rounded it out and brought it home to light green...

I started using this technique for painting thrusters back during my MK II walkthrough and I think I'm going to stick with it, I love the finished product. First I primed the thruster and painted it, focusing on the interior, with Alclad Duraluminum. From there I applied some layers of clear orange until it was almost red, as if the thruster is glowing with heat.
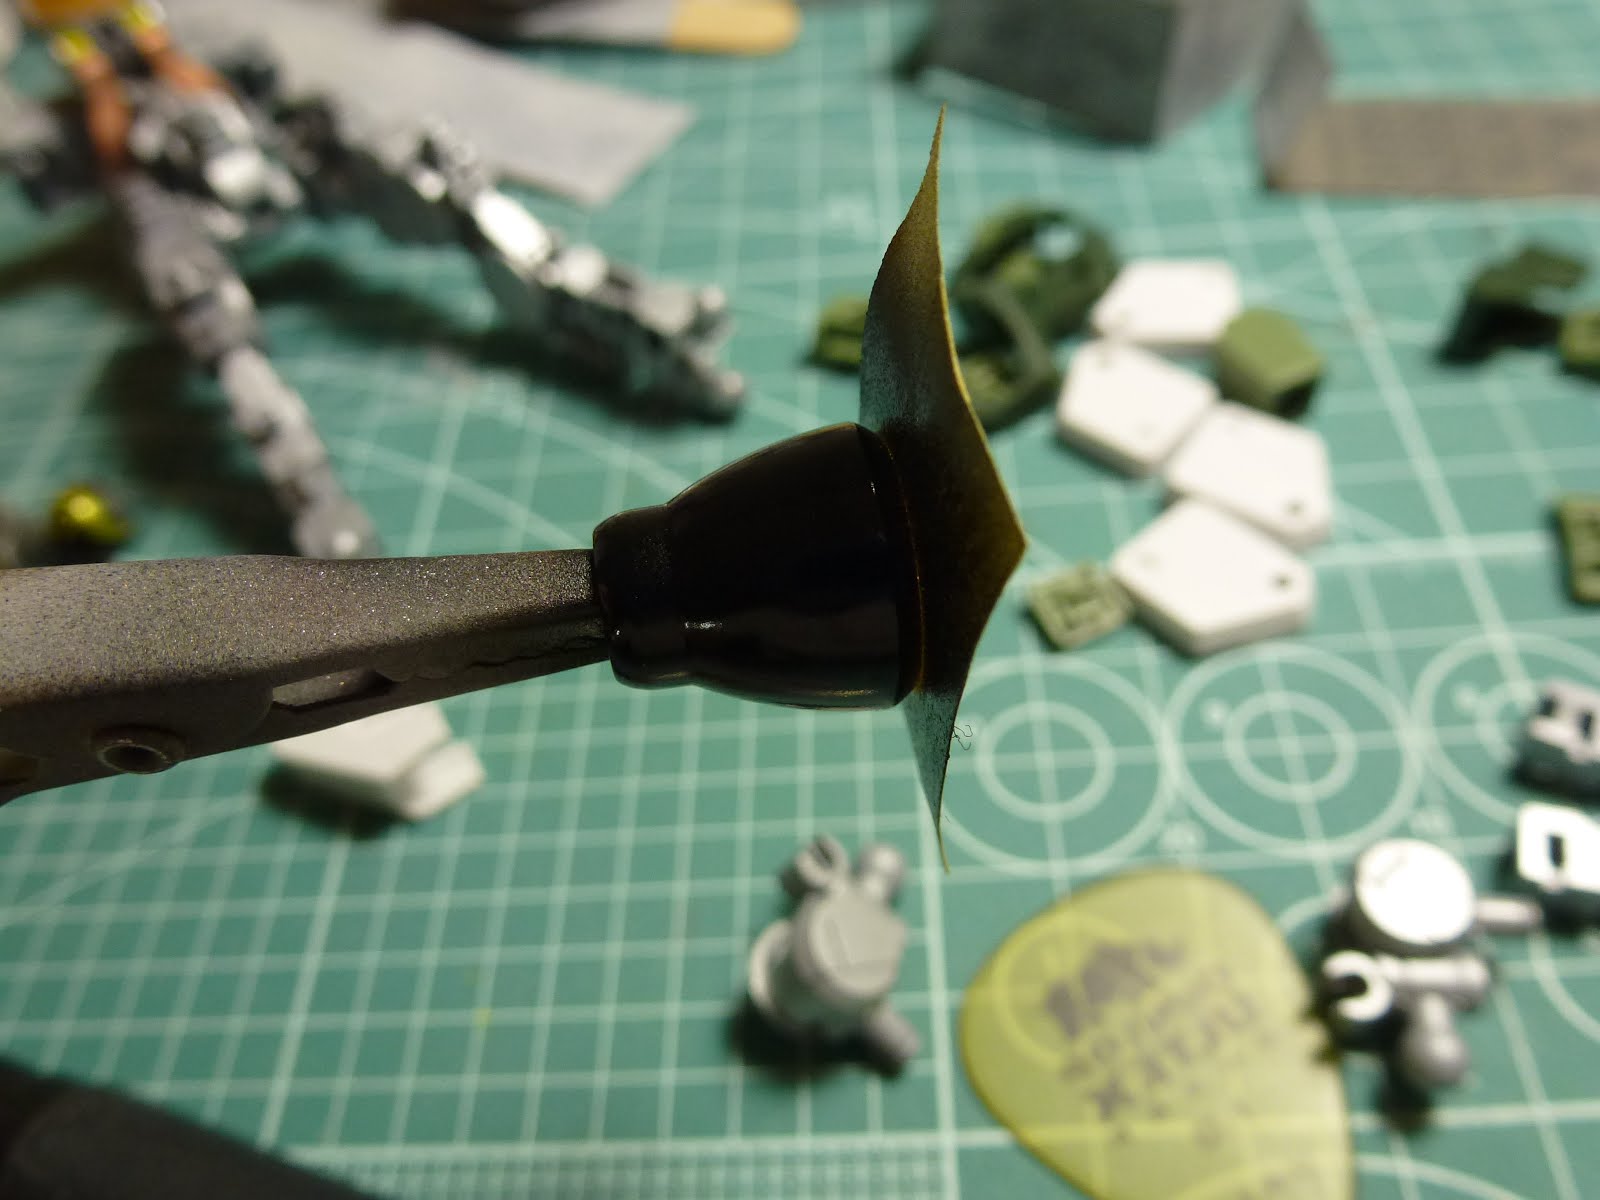
The next step is simply to place some masking tape on top of the thruster opening and prime the outside with a gloss black enamel, Testors, Tamiya, or Alclad.


Paint the outside using Alclad Chrome and remove the tape. The burner is reflective silver on the outside and shiny orange-red on the inside! I like this effect a lot, especially for suits that have 3 or 4 thrusters on the back.

While working on mobile suits past, I've only felt it was necessary to panel line when what you were panel lining was exactly that: a panel line. For this kit I decided to experiment a bit and try lining the recesses of armor plates, as is the popularized style. To my surprise and relief, it worked quite well, and I may continue forward with another page in my stylistic notions archive.
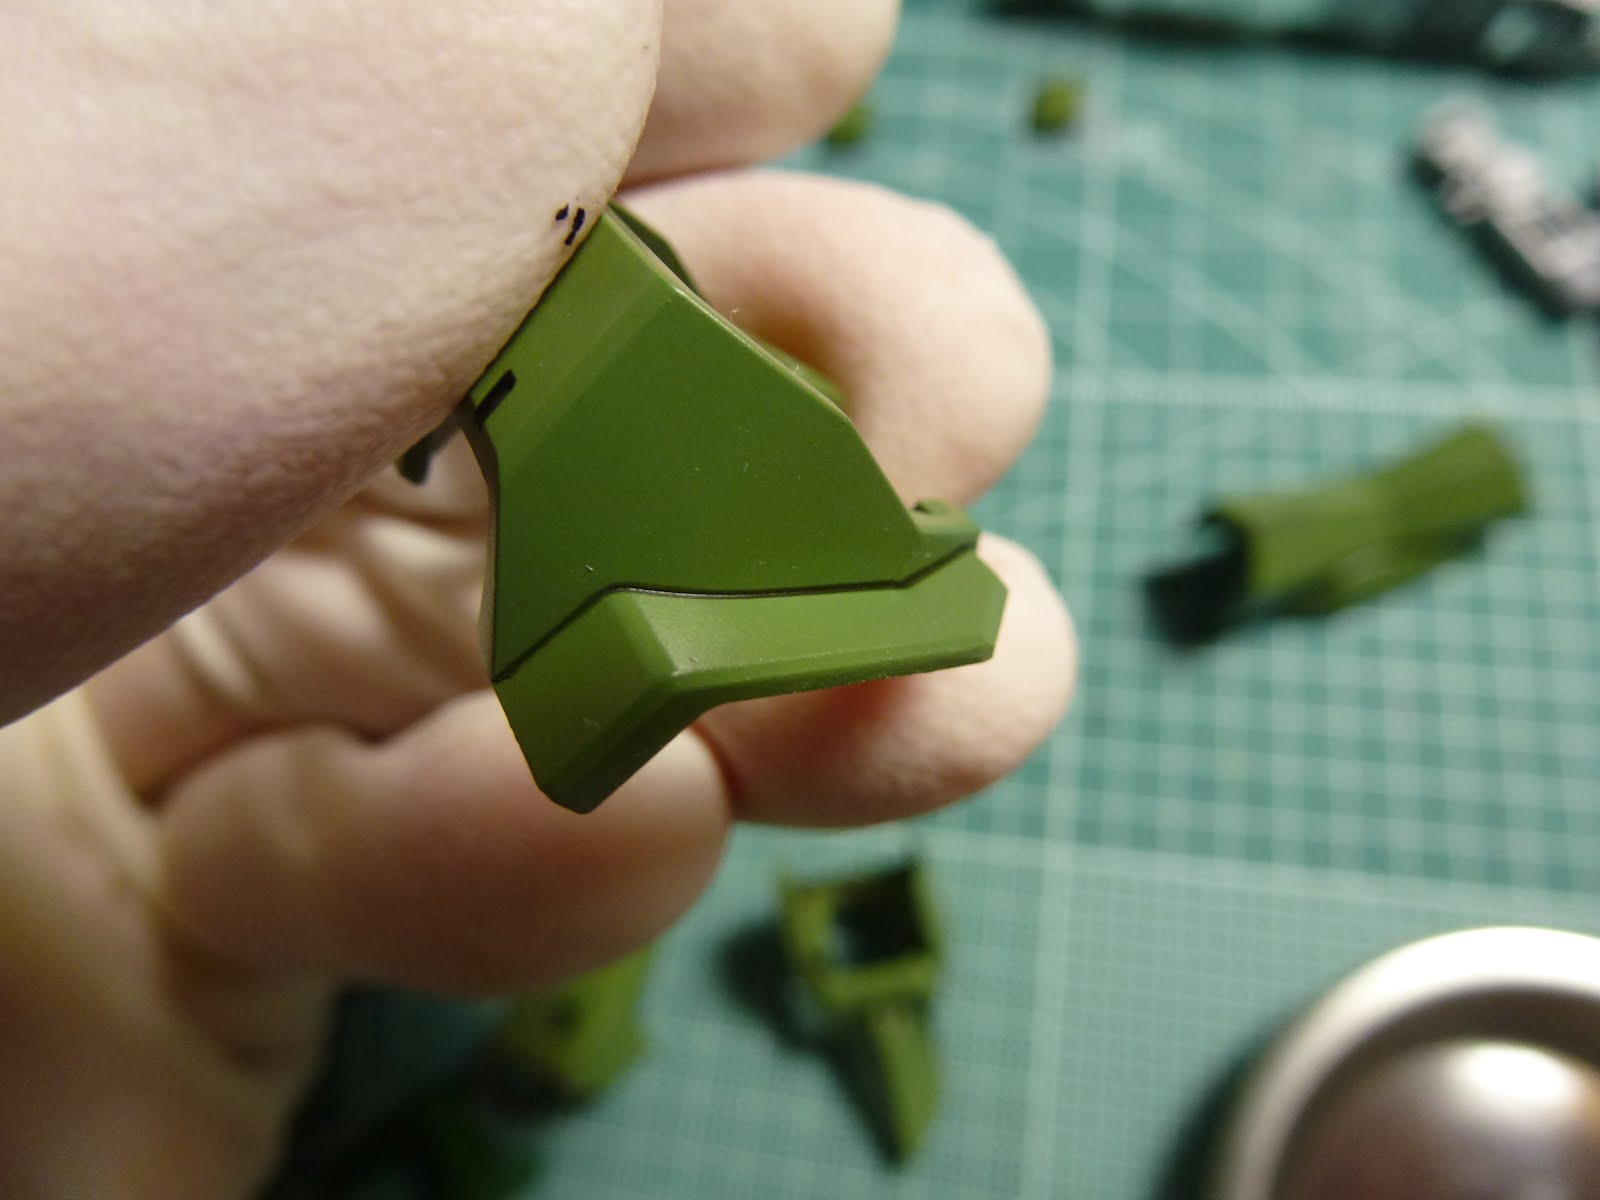
Another photo of the aforementioned recessed lining. I'm actually really satisfied with how it came out!

If anyone out there is looking for the solution to clean lines, look no further, these tiny q-tips are the answer! These are the Tamiya precision cotton swabs, and man, they make things like panel lining and reverse washes so easy. Due to how firm the cotton is, you can drag the swab along the recessed areas, adjusting the angle of the tip in order to contour the width of your panel line, just as I'm doing in the above photo. *Worth noting that this is using lighter fluid to clean enamel panel lines.*

Another piece with recessed lines, contoured using the technique I previously detailed.


I decided to use the HG Unicorn decals to accent this kit, obviously staying away from any logos or Anaheim Electronics decals. I just stuck to the little caution signs and I feel like it contributed greatly to the overall aesthetic of the kit. If anyone knows of some aftermarket IBO HG decals, please link me in the comments! I hate having to scrounge up non-canon decals to get the look I want...

The only thing left now is assembly and photos, so I hope to have a photoshoot of the completed kit up by sometime tomorrow. Then it's finally time to complete my WIP tutorial series, and get some photos of the completed MK II! Thanks for reading!
No comments:
Post a Comment